Copy a WebAssign Course to a New LMS Course

Copy an existing WebAssign course to a new LMS course. You can copy your own WebAssign course or another instructor's course.

To copy both your LMS course and WebAssign course at the same time, see Copy Your WebAssign-Integrated Course in LMS.

To copy another instructor's course, ask the instructor for the class key of the course to be copied.

The following procedure is for LTI Advantage integrations. If the Cengage link in your course navigation works, see LTI 1.0.

  1. Open your LMS course.
  2. Click Modules in the course navigation.
  3. Locate or create the module that will contain your course link.

    The Cengage tool might not be available in both of the following locations depending on your Canvas admin's settings.

    To create a course link in a new module:
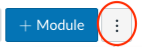
    1. Click more options next to +Module.
      more options next to +Module in Canvas
    2. Click the Cengage tool.

    To add a course link to an existing module:

    1. Locate the module and click add content.
    2. Set the dropdown to External Tool.
    3. Click the Cengage LTI Advantage tool.

      Look for magnifying glass to confirm that the tool is LTI Advantage.

  4. Click the Content tab.
  5. If you have not already done so, create a module in your course.
    1. Click Add a module and enter your module title.
  6. In your module, click Add Existing Activities > Cengage.

    The Cengage tool may be named differently for your school. Ask your LMS Admin if you are unsure.

    If you do not see the Cengage tool, try this instead.

    1. Click Related Tools > Course Builder.
    2. Drag New Cengage Learning from Add Content to your module.
  7. If prompted, sign in to your Cengage instructor account to link your LMS and Cengage accounts.

    If you don't have a Cengage instructor account, click Create Account.

    This window might not be shown if your browser does not allow pop-ups for the LMS domain.

  8. Click Add Homework Platform.
  9. Select the textbook or product you want to use from the available course content.
    • To search the available content, type a search term.
    • To see only WebAssign results, click Filter and set Filter By to WebAssign.
    • To filter the list by license type, click Filter and set the dropdown to Student Purchase Required or Inclusive Access.
    • To select an item, click Link to Course.

    The selected title is shown with WebAssign course creation and linking options.

  10. Select the course to be copied.

    To copy your own course:

    1. Select Copy from my existing WebAssign course.
    2. Select the course or section to copy.

    To copy another instructor's course:

    1. Click Copy from another instructor's WebAssign course.
    2. Enter the Course Key for the course you want to copy and click Verify.
  11. Complete the details for your WebAssign course.
    Field Notes
    Course Name
    Tip Include the academic term in the course name.
    Course Start Date

    This date is set automatically by Willo.

    This date is both the first day students can access your course and the beginning of your students' temporary access period. It cannot be changed after students access the course.

    Course End Date

    This date is set automatically by Willo.

    To allow your students to view their grades and complete late work, consider setting this 1 week after the last day of class.

    Time Zone

    Assignment dates and times are based on the time zone you select.

  12. Click Continue.
  13. Click the link to your WebAssign course.

    First time only: Confirm that LMS can access your account.

    If prompted, read and accept the service agreement.

A link to your WebAssign course is added to your module.