If you want to assign your students group work in WebAssign, you can either create
different student groups for each assignment, or you can create one set of student
groups
for your class to use for all of your group assignments.
To create different student groups for each assignment in the course, see Schedule Group Work.
-
Open the My Classes
page.
Click and find the section you want.
-
Under Class Tools, click Roster.
-
In the Roster page, click
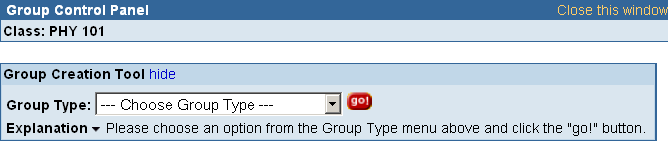
Group Control Panel.
-
If necessary, click Show Group Creation Tool.
If you have existing student groups, changing
Group Type will
overwrite previous creations. To edit existing groups,
skip to step 7.
-
To automatically assign students to groups, use one of the following methods.
| To do this |
Do this |
| Randomly put students into groups. |
- For Group Type, select
Random.
- Type either the preferred number of students per group or the
number of groups you want to create.
- Select either students per group or
groups.
- Click go.
|
| Randomly put students into groups that reflect an even
distribution of your students' total scores received so far for the
class.
Note To use this option, you must already have set up your
GradeBook.
|
- For Group Type, select Overall
Score.
- Type either the preferred number of students per group or the
number of groups you want to create.
- Select either students per group or
groups.
- Click go.
|
| Randomly put students into groups that reflect an even
distribution of your students' scores for an assignment. |
- For Group Type, select
Assignment Score.
- Type either the preferred number of students per group or the
number of groups you want to create.
- Select either students per group or
groups.
- Select the Assignment with the scores you
want to use as a basis for your groups.
- Click go.
|
| Use the student groups you defined for another
assignment. |
- For Group Type, select Group
from Previous Assignment.
- Select the previous Assignment with the
groups you want to use.
- Click go.
|
Note
- You can click go multiple times to see
different randomizations of students into groups.
- When groups are based on distributing scores, each group of
n students is comprised of one randomly
selected student from each nth of the class based
on the score being used. For example, for groups of three students,
one student is selected from the top third, one from the middle
third, and one from the bottom third. Each student's score is
displayed in the list of groups.
- You can manually adjust groups after selecting one of the
randomization methods.
-
To manually assign students to groups, for Group Type,
select Manual. Then click
go.
-
Define or change your student groups manually if needed.
| To do this |
Do this |
| Create a new group. |
- Select Create Group.
- Type a group name.
- Click OK.
|
| Name or rename a group. |
- Click rename.
- Type a group name.
- Click go.
|
| Remove a student from any group. |
- Select the check box for the student.
- In the Modify Selected list, select
Remove.
|
| Move an ungrouped student to a group. |
- Select the check box for the student.
- In the Modify Selected list, select
Move.
- In the Student Groups window, click the name of the group.
|
| Move a student to a different group. |
- Select the check box for the student.
- In the Modify Selected list, select
Move.
- In the Student Groups window, click the name of the new
group.
|
-
When you are satisfied with your student groups, click Save
Groups and close the Group Control Panel.
Each student's group is listed after their name in the Roster
page.
Inform your students about which groups they are in. Your students will see this information
when
they view the assignment in WebAssign, but they might want to discuss the assignment
with group members before starting to work on it.
You can use your browser's print function to print the Group Control Panel
page after you have created the student groups.