Create Marvin JS Questions That Require Students to Create a New Drawing

For some Marvin JS questions, you might want your students to draw a structure or reaction starting with an empty drawing area. This kind of question can ask your students to perform both analytical and synthetic thinking, much like an essay question.

Note For questions in which the relative position of each atom is important — resonance structures, reaction mechanisms, hybridization states, chiral centers, and reaction centers — you must display an initial template drawing for your students to modify. See Create Marvin JS Questions That Display an Initial Drawing.
  1. Click Questions > Create.
    The Question Editor opens.
  2. In Name, type a name for the question.
  3. In Mode, select Fill-in-the-Blank.
  4. Create your answer key using the Marvin JS Key Generation tool.
    1. Click Marvin under Page Tools.
    2. For Marvin Type, select the drawing mode to use.
      Important Always draw your chemical structure using the same mode you want to use in your question. See Marvin JS Drawing Modes.
    3. Draw the chemical structure or reaction.
    4. Click Get Key.
    5. In the text box, select and copy the entire Marvin JS XML.
  5. In Question, add the following code, replacing answer_key with the key you copied from the Marvin JS Key Generation tool:
    <eqn>
    $mykey='answer_key';
    ''
    </eqn>

    This code assigns the Marvin JS answer key to the variable $mykey. You can use a different variable name if needed.

    Note
    • Always enclose the Marvin JS XML in single quotes ('), not double quotes (").
    • Do not paste Marvin JS XML directly in Answer. Instead, assign it to a variable and reference the variable as described in this topic.
    • Question, Answer, and Solution each have a 65,536 character limit. Any characters beyond that limit are not saved. Depending on the size and complexity of your Marvin JS XML, your question might exceed this limit without warning.
  6. In Question, type your question.

    Use the answer placeholder string <_> to specify where the answer box should be displayed.

  7. In Answer, type the following items on a single line:
    <EQN $MARVIN='mode'; $mykey>
    mode is one of the following values and corresponds with the mode you used to create the drawing:
    complete
    condensed
    lewis
    mechanism
    mechanism_adv
    reaction
    reaction_adv
    resonance
    skeleton
    skeleton_adv
    spacefill
    3D
    Note
    • If an answer extends beyond the right side of the Answer box, it is wrapped to the next line, but it is still considered a single line so long as you do not press ENTER.
    • You can specify alternative answer keys separated by the characters {tab}. For example:
      <EQN $MARVIN='condensed'; $mykey1> {tab} <EQN $mykey2>
  8. Optional: Type a Solution.

    The solution helps your students understand the steps they need to take to determine the correct answer to the question. Your assignment settings specify when to show the solution.

  9. Click Test/Preview to test the appearance and behavior of the question. See Test Questions.
  10. Click Redisplay to show certain kinds of errors in the Display section of the Question Editor. Make any needed changes to your question.
  11. Optional: Click Show Additional Information and change the question's sharing permission or add descriptive information.
    • By default, other instructors can use your question only if you provide them with the question ID, and only you can edit the question or find it in search results. To change the permission, see Share Questions With Other Instructors.
    • If you make your question publicly available, you might want to provide descriptive information to help others search for it. See Add Search Metadata to Questions.
  12. When your question displays and functions correctly, click Save.

    WebAssign assigns it a unique question ID (QID), which is displayed in parentheses after the question name.

    You can use your question in an assignment and see it in your My Questions list only after it is saved.

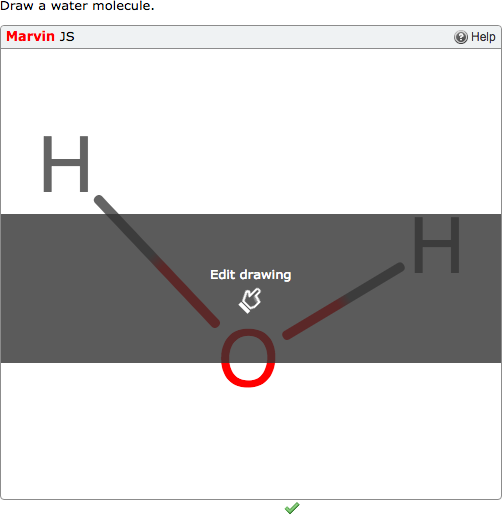
Example Marvin JS Question

The following table summarizes an actual question.

QID
3436779
Name
Template2 5.MARVIN.01.
Mode
Fill-in-the-Blank
Question
<eqn>
# -----------------------------------------------
#    Set $mykey to the answer key created 
#    with the Marvin Key Generation tool
# -----------------------------------------------
$mykey='<?xml version="1.0" encoding="UTF-8"?><cml version="ChemAxon file format v5.10.0, generated by v15.8.9"><MDocument><MChemicalStruct><molecule molID="m1"><atomArray><atom id="a1" elementType="O" x2="-0.4097222222222223" y2="2.860555555555555"/><atom id="a2" elementType="H" x2="-1.743401344050258" y2="2.0905555555555555"/><atom id="a3" elementType="H" x2="0.9239568996058134" y2="2.0905555555555555"/></atomArray><bondArray><bond atomRefs2="a2 a1" order="1"/><bond atomRefs2="a3 a1" order="1"/></bondArray></molecule></MChemicalStruct></MDocument></cml>';
''
</eqn>
Draw a water molecule. <BR>
<_>
Answer
<EQN $MARVIN='complete'; $mykey>
Display to Students
Question as displayed to students
Tip WebAssign has created tutorial questions to help your students learn to use Marvin JS for specific tasks. Use any of the following tags in your question to add a link to the relevant tutorial:
  • <PRACTICE qid='marvin.micro.tutorial.charges' link='Marvin JS Tutorial' style='none'>
  • <PRACTICE qid='marvin.micro.tutorial.coordinate bonds' link='Marvin JS Tutorial' style='none'>
  • <PRACTICE qid='marvin.micro.tutorial.electron flow' link='Marvin JS Tutorial' style='none'>
  • <PRACTICE qid='marvin.micro.tutorial.functional groups' link='Marvin JS Tutorial' style='none'>
  • <PRACTICE qid='marvin.micro.tutorial.generic groups' link='Marvin JS Tutorial' style='none'>
  • <PRACTICE qid='marvin.micro.tutorial.isotopes' link='Marvin JS Tutorial' style='none'>
  • <PRACTICE qid='marvin.micro.tutorial.lone pairs' link='Marvin JS Tutorial' style='none'>
  • <PRACTICE qid='marvin.micro.tutorial.mapping' link='Marvin JS Tutorial' style='none'>
  • <PRACTICE qid='marvin.micro.tutorial.organometallics' link='Marvin JS Tutorial' style='none'>
  • <PRACTICE qid='marvin.micro.tutorial.radicals' link='Marvin JS Tutorial' style='none'>
  • <PRACTICE qid='marvin.micro.tutorial.wedge bonds' link='Marvin JS Tutorial' style='none'>

For example:

Assign lone pairs where appropriate. <PRACTICE qid='marvin.micro.tutorial.lone pairs' link='Marvin JS Tutorial' style='none'>